|
Z80 Build From Scratch |
| Page 1: Z80 CPU |
|
Z80 CPU image by Sakurambo Overview: We're going to show you the steps taken to build a Z80 8-bit computer from "scratch". It will have 64KB of memory and a serial interface to connect to your PC.
Is it Z80 or Z84C00? Z84c00 refers to the CMOS (complementary metal-oxide-semiconductor) version of the Z80, which consumes less power and can operate at higher clock frequencies (up to 20 MHz, compared to the NMOS's 8 MHz maximum). When people refer to the "Z80" generically, they are talking about the architecture implemented by both the Z8400 and Z84C00 product lines.
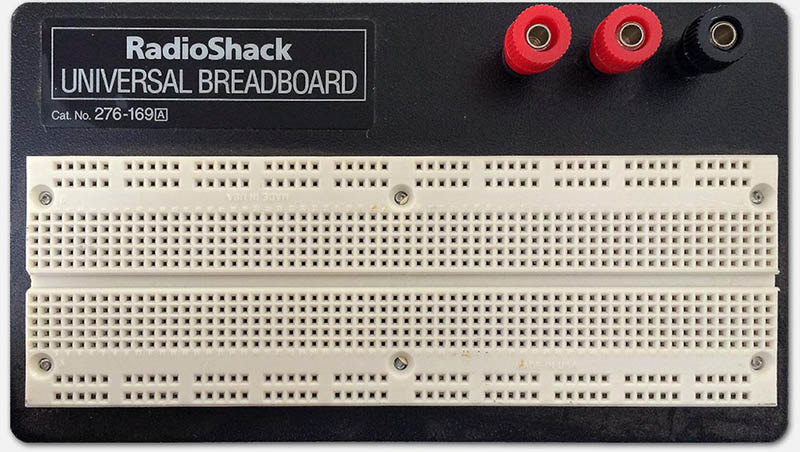
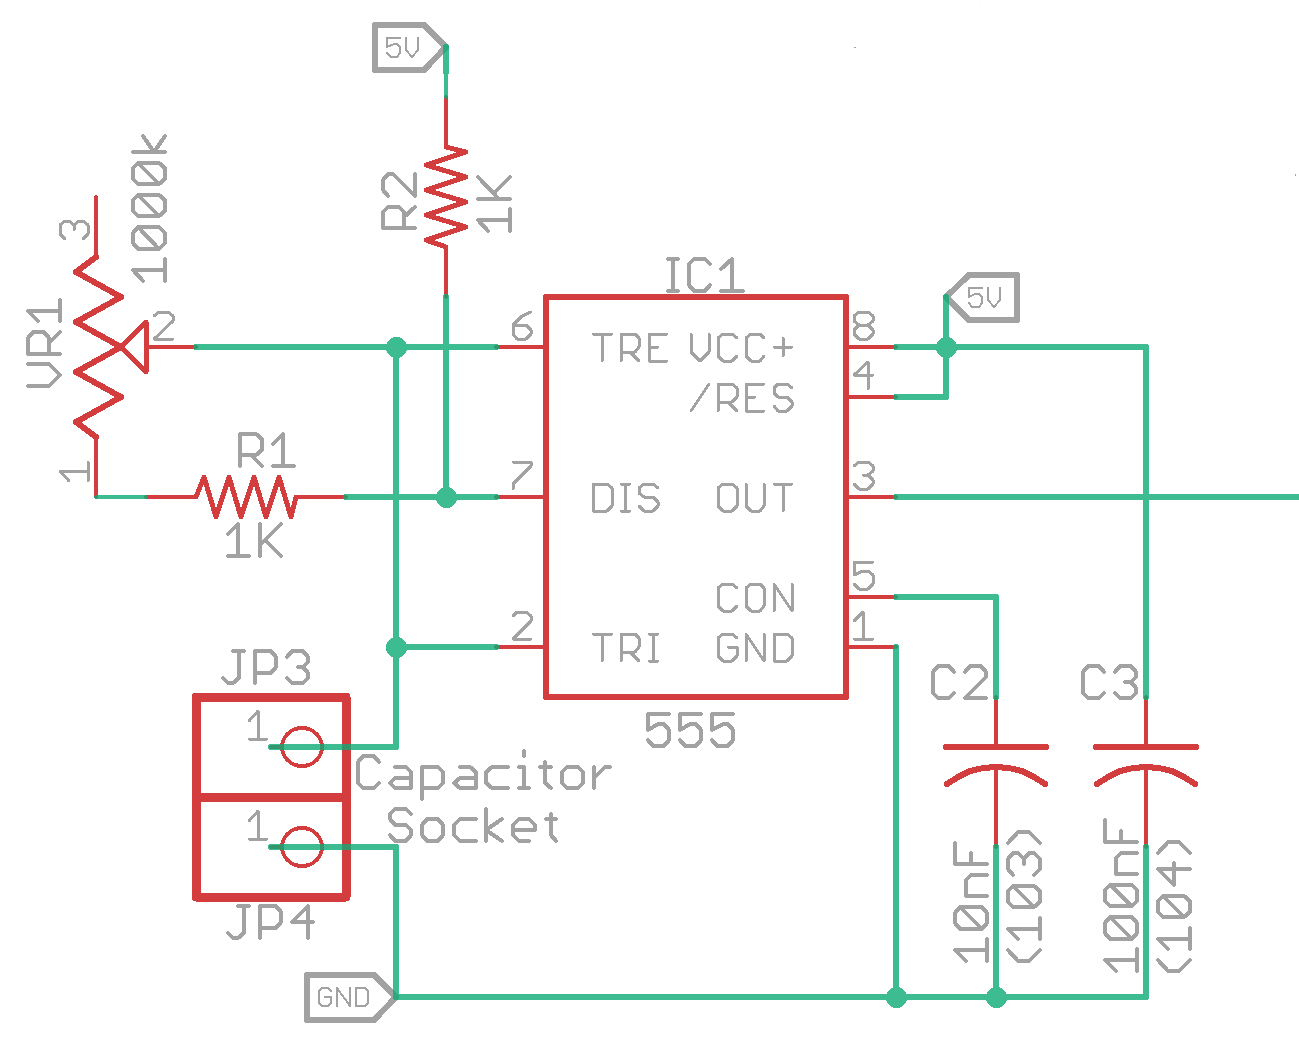
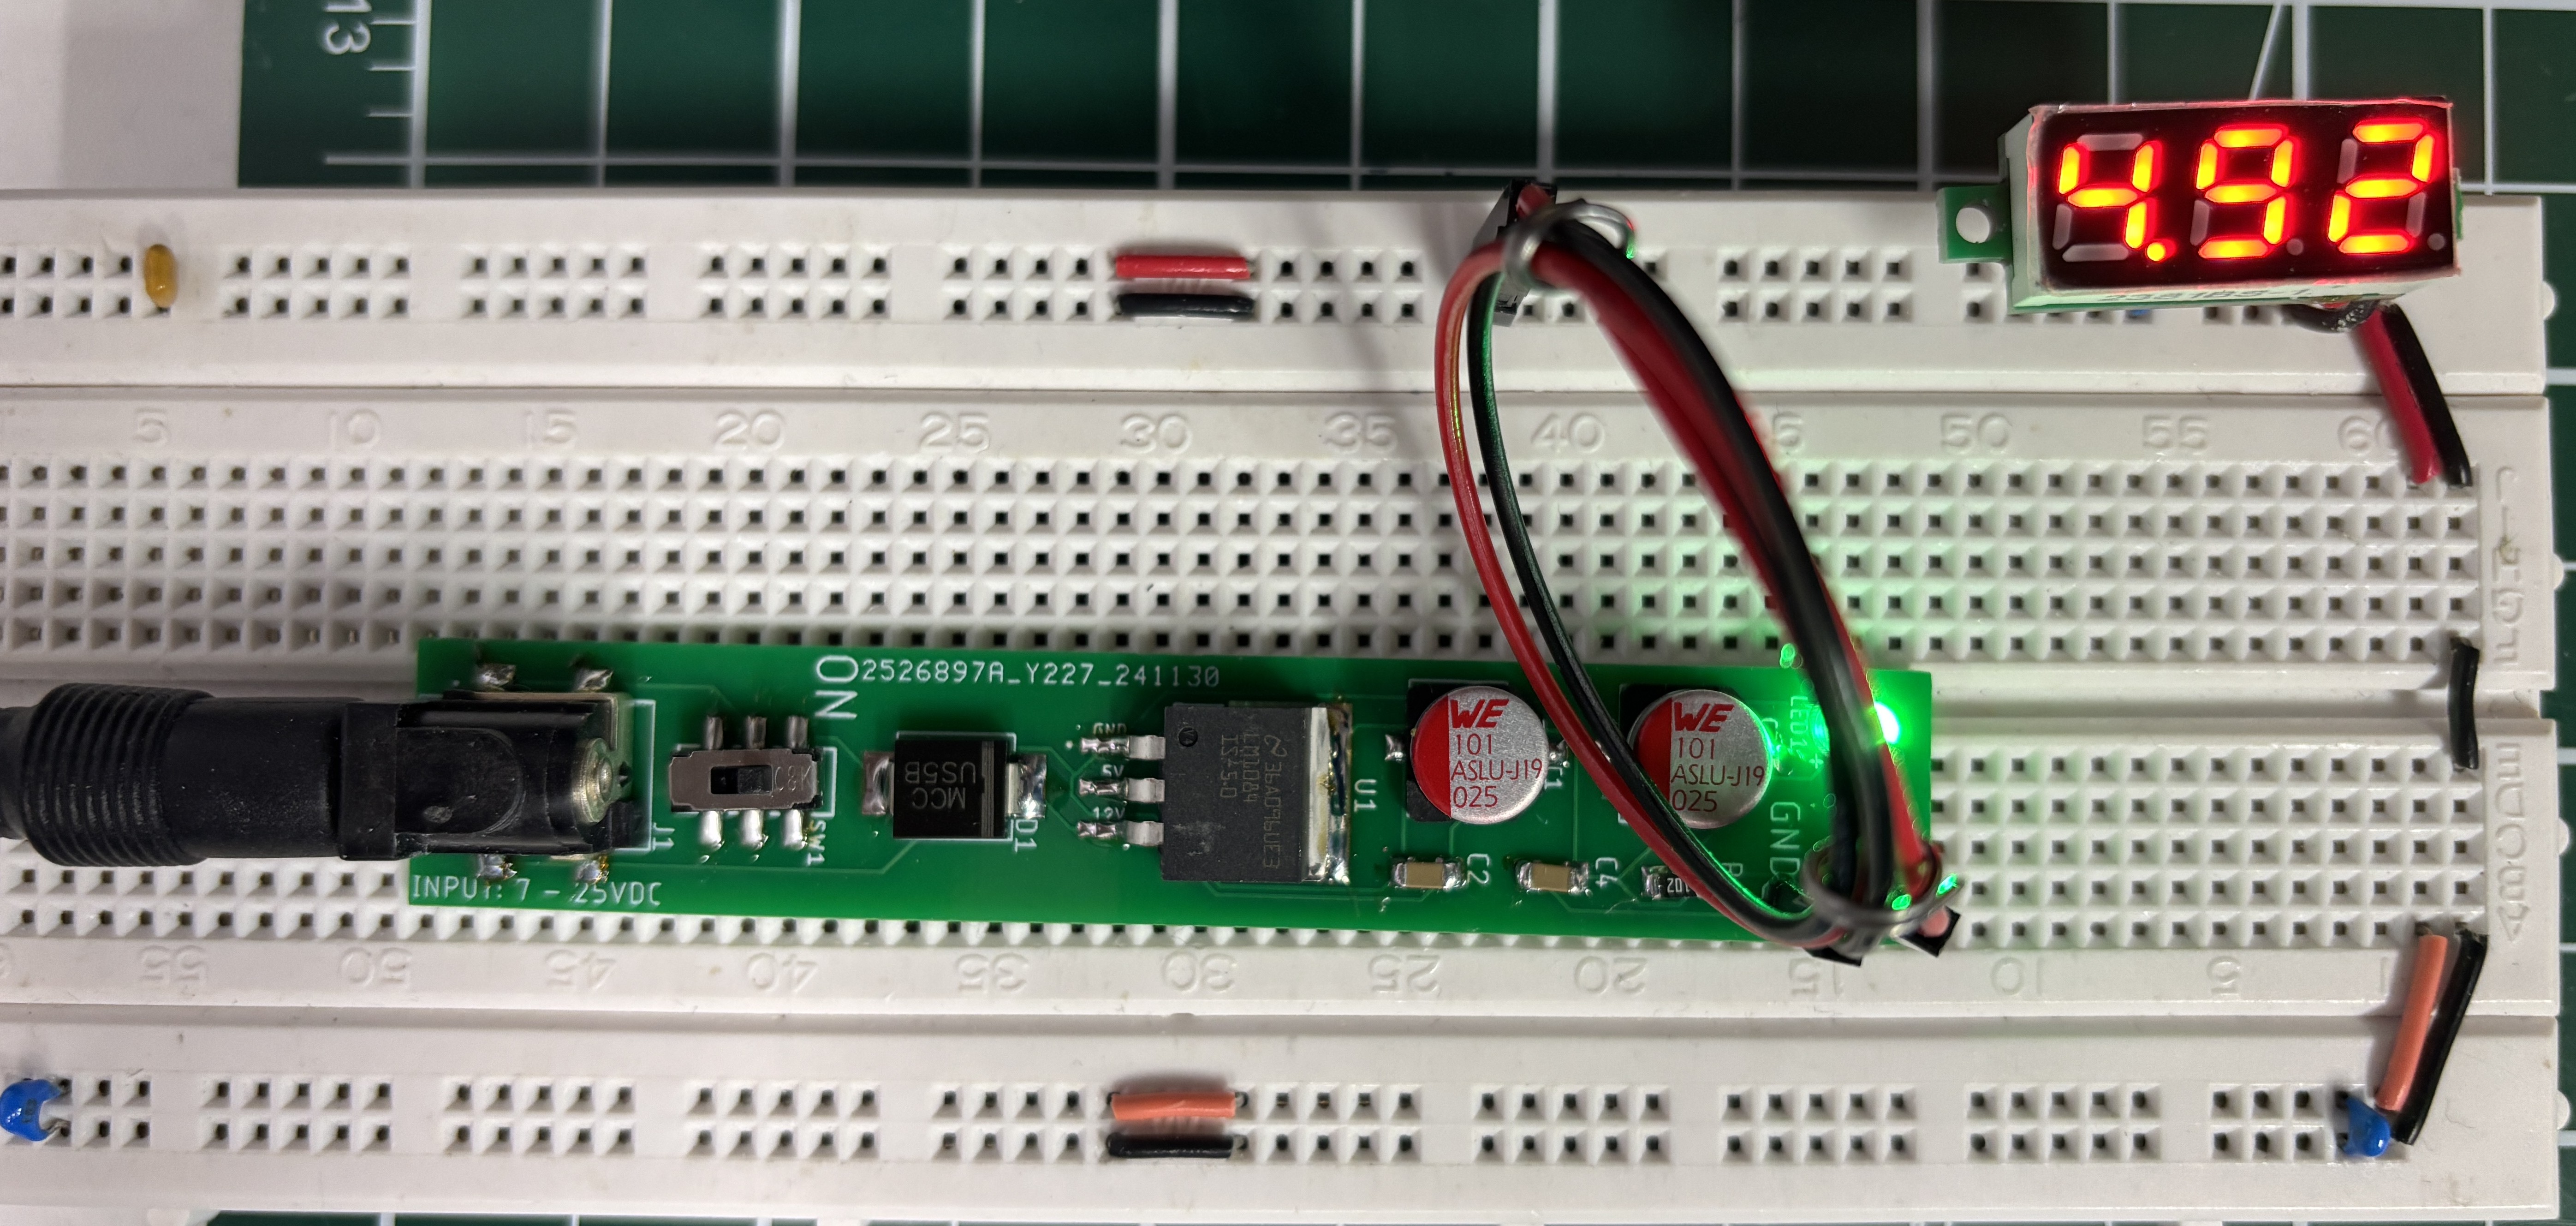
Initial Steps: 1) Wire at least two breadboards together. There's lots of problematic off-shore ones out there so I prefer the Radio Shack units, if you can still find them. Note that the BB is screwed to the aluminum backing plate which can be removed and used for project cases, etc. Note that the newer RS units are not riveted and also have breakaway power bars. Additionally, each power bar is segmented so you could run two different power sources, e.g., 5v and 3v3 on the same rail. You can see the red and black jumper wires that are used on the top power rail on the right-most photo shown below. 2) Use lots of 100nF (0.1uF) decoupling capacitors labeled "104" connected nearest to all of the IC power pins to remove "switching noise" 3) Provide clean 5v power; you'll need at least 1 amp. Here is a breadboard power supply I built just for this project. You could use a 5v phone charger if it produces enough current, keeping in mind that the standard v2.0 USB-A port only has to provide 500mA, as per the spec. v3.0 can supply up to 900mA. USB-C can supply much more 4) You'll need a digital clocking signal source. Here's one you can build as a simple 555 timer circuit that runs from 1Hz to 100Hz using a 1M ohm resistor and 1uF electrolytic capacitor. That should start us off well before we switch over to a much faster crystal oscillator
Click on the images below to enlarge
Radio Shack Breadboard Variable 1Hz - 100Hz Clock Clock Videos (2) 5V 5A Breadboard Power Supply v1.0
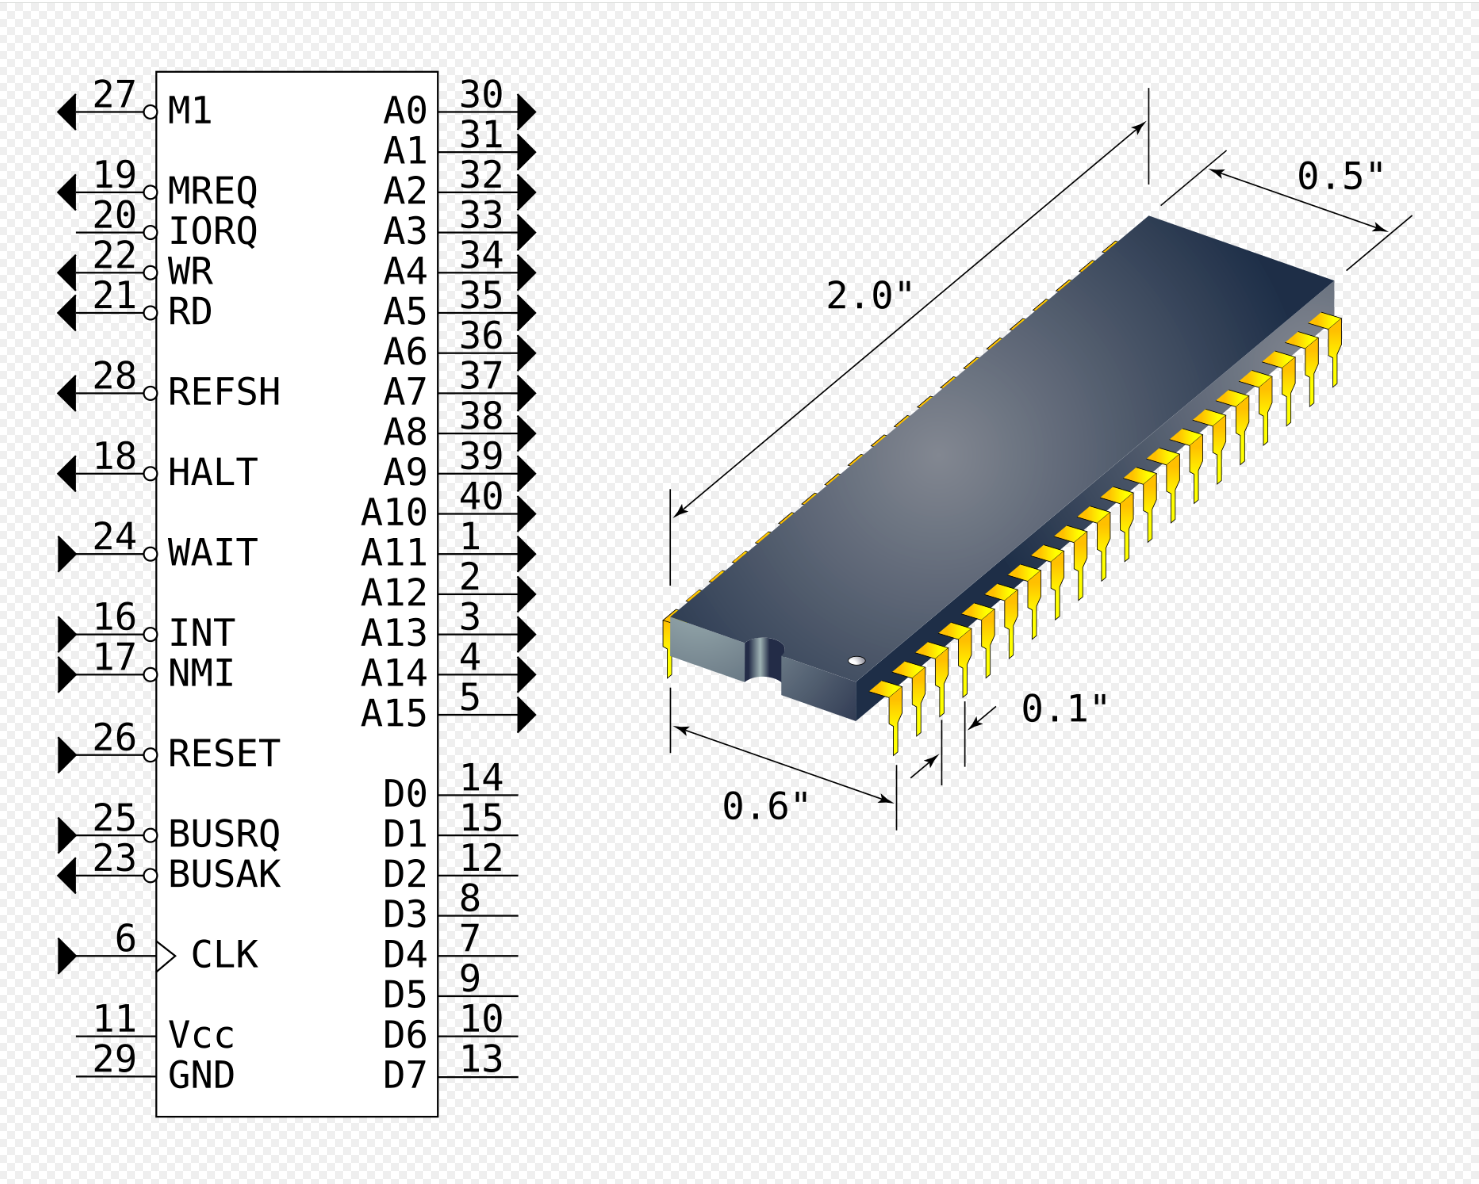
On the next page we'll connect the power and clock signal to the Z80. Pins: These are the Z80 pins you'll be working with: 5v DC power: pin 11 = 5v, pin 29 = Gnd. Variable frequency clock: pin 6.
|
![]()
Updated 2025-11-27