|
Project 43: |
|
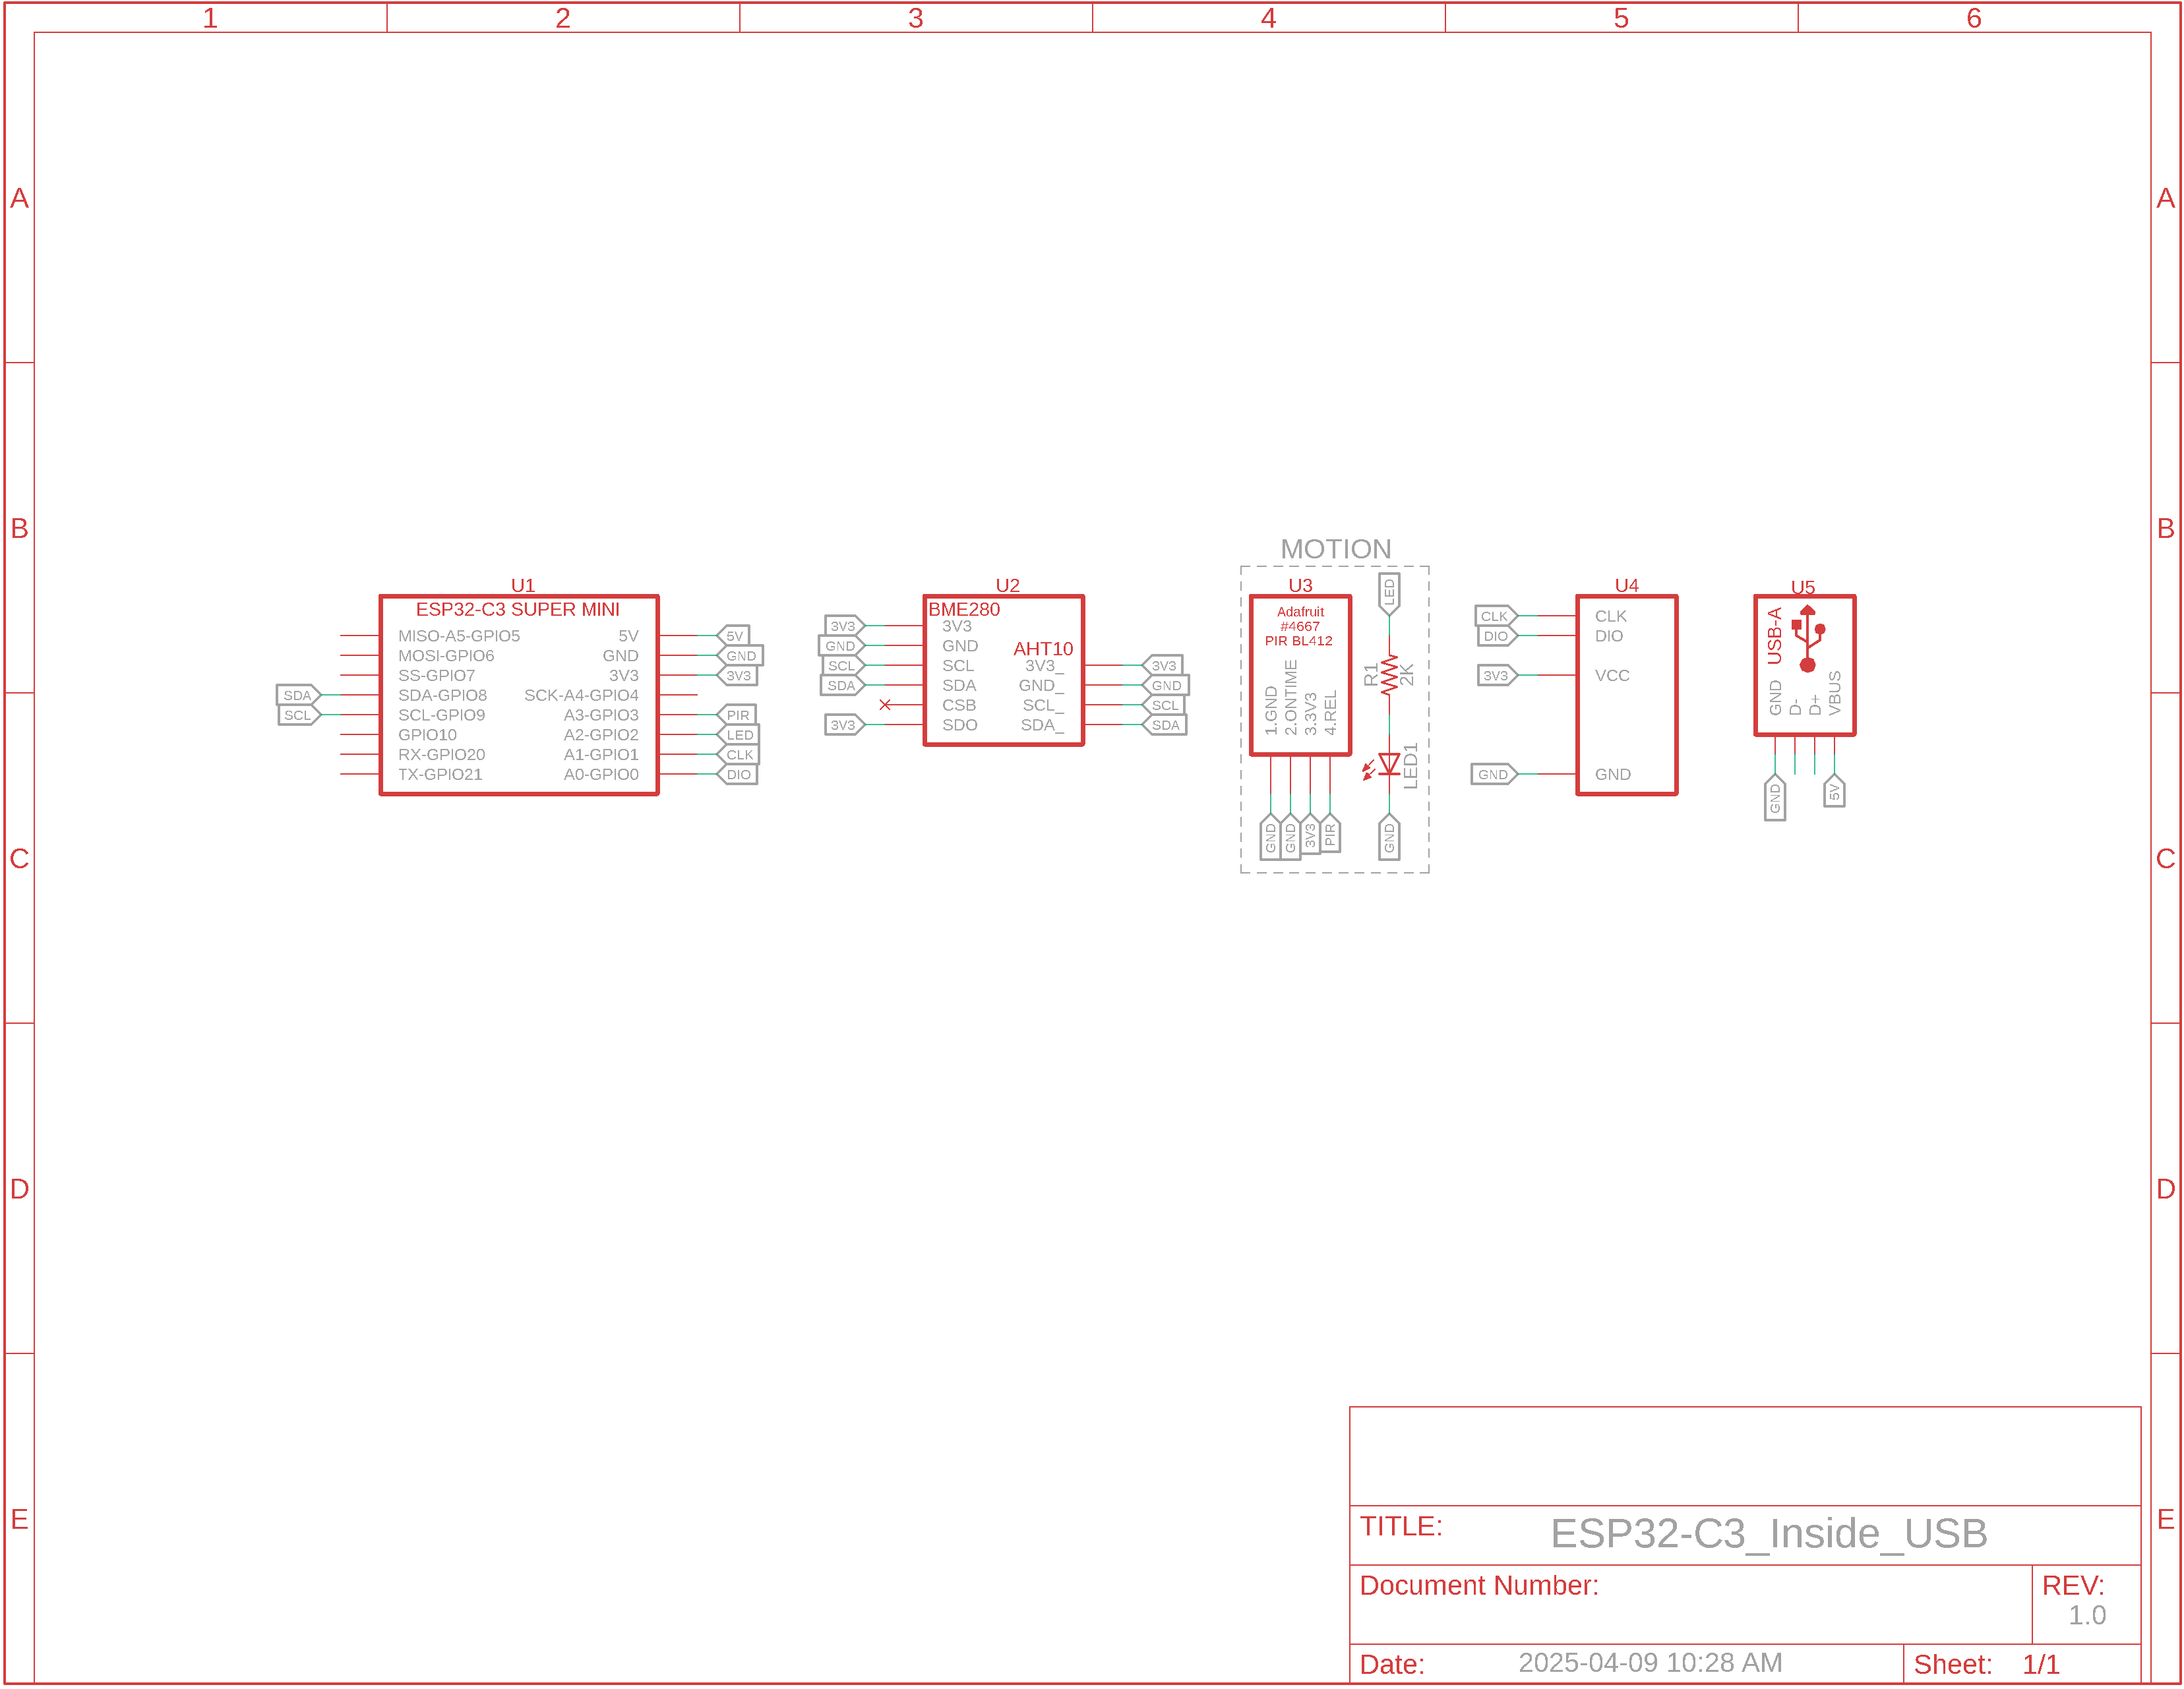
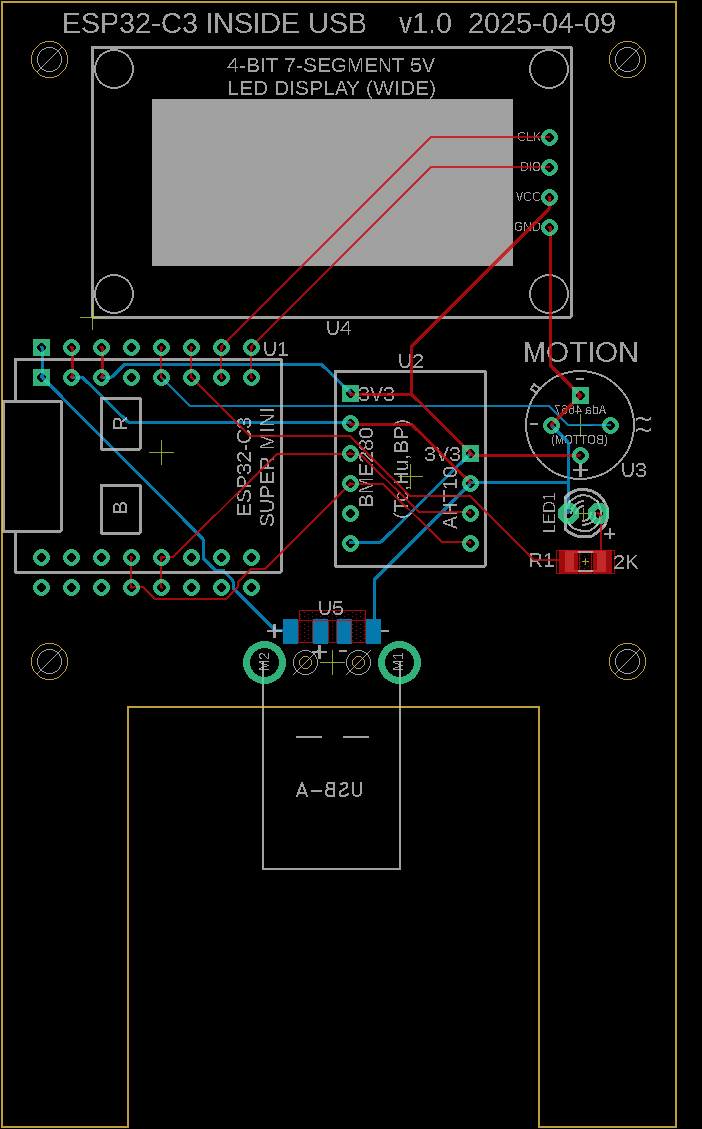
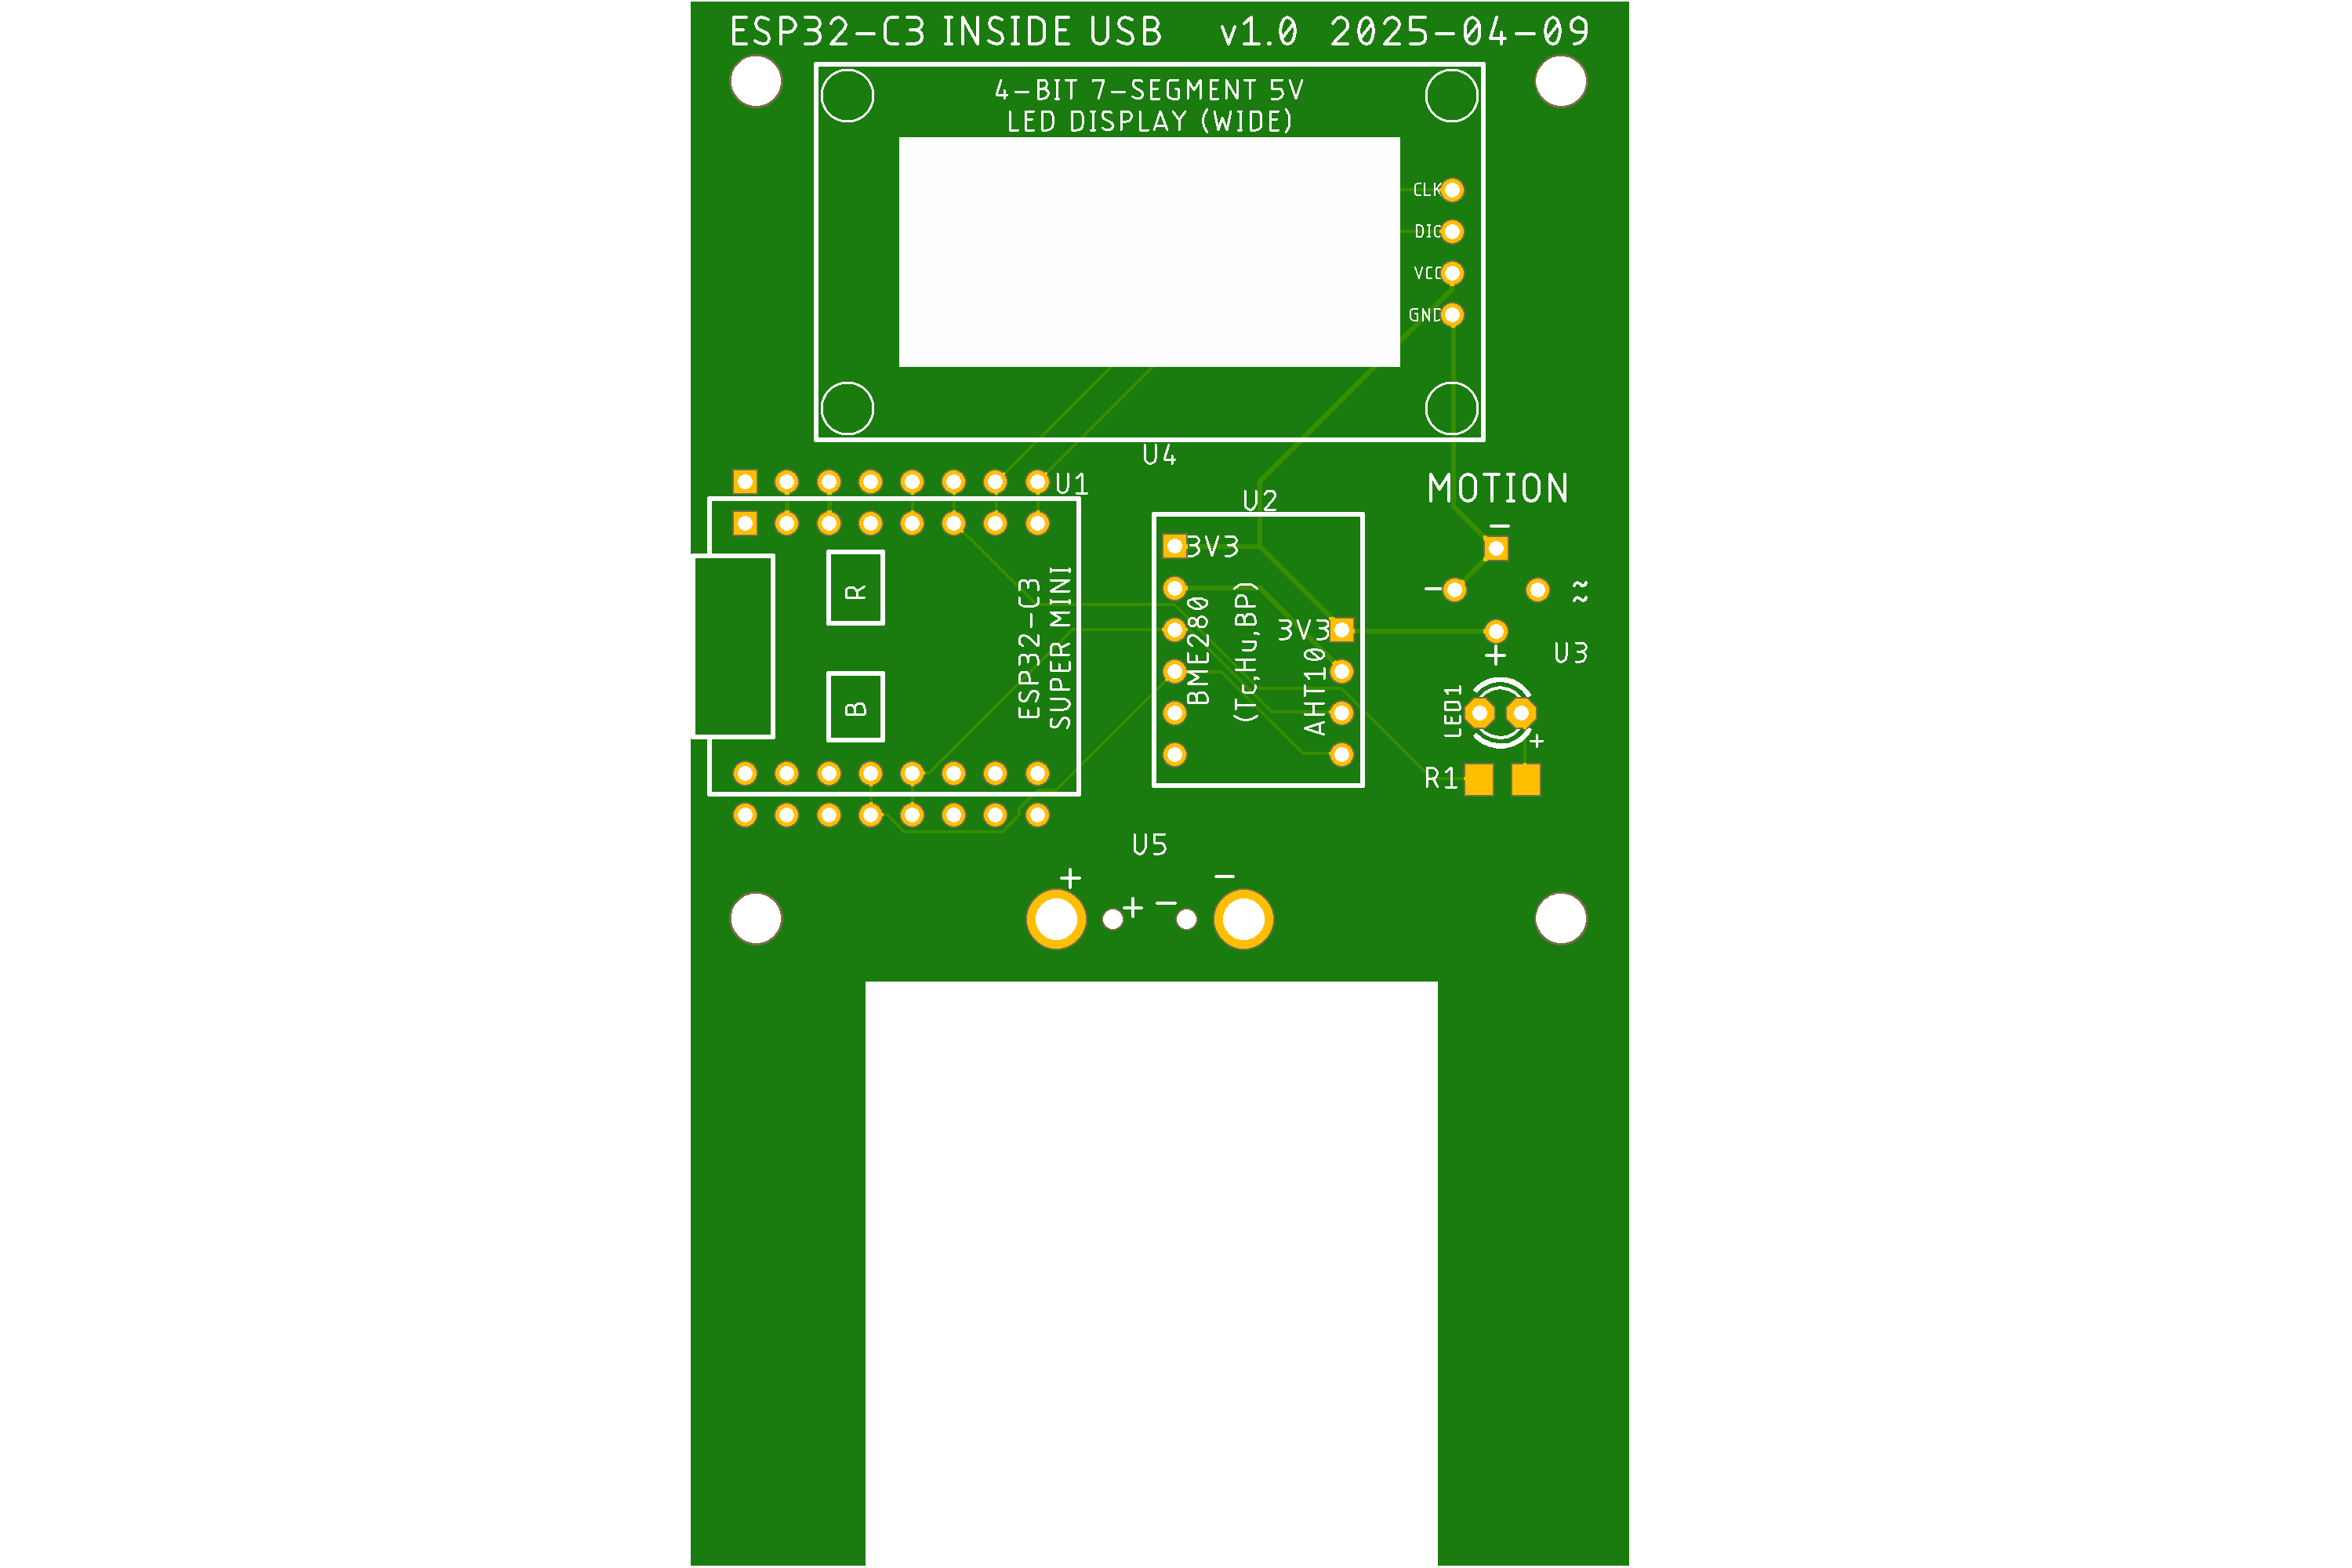
ESP32-C3: Schematic, Board Layout, PCB Top, Pinout Diagram
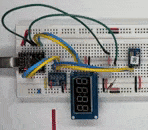
Short Video of v1.0 (Click to enlarge)
Overview: An ESP32-C3 microcontroller uses WiFi to pulldown the current time, accurate to within one second. A BME280 provides Tc, Hu, and BP to a 4-bit 7-segment "tube" display. There is also code commented out if you choose to run the much cheaper AHT10 sensor. The PCB uses a male USB connector to attach itself to a USB "cube" with a vertical receptacle.
Components: ESP32-C3 Dev Board, AliExpress_4-digit_7-segment_LED_Module, https://github.com/sidharthmohannair/Tutorial-ESP32-C3-Super-Mini/.
ESP32-C3 Arduino Code: v1.0\Code\_ESP32-C3_USB_Inside.ino
Testing During Assembly: Insert only the BME280 sensor and run the Adafruit test file bme280test.ino If you're using the AHT10 instead, run the Adafruit test file adafruit_aht10_test.ino If either tests well then you can run the full program listed above this section.
|
![]()
Updated 2025-05-05