|
Z80 Build From Scratch |
|
| PAGE 15c: UART String & Echo Test | |
|
Overview: This program will initialize the UART, print a predefined string of characters, then echo user keypresses. We've taken the 165-line program, RS232_String_Echo_2e.asm, and broke it into 6 chunks.
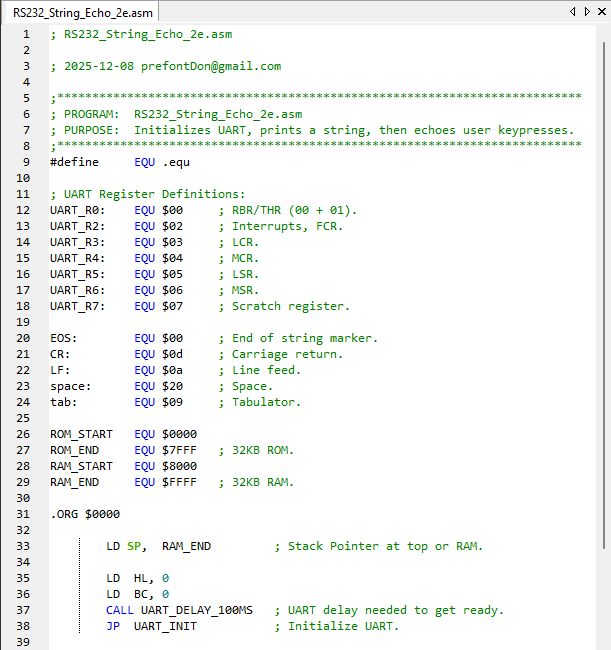
UART Register Definitions The UART is located at I/O address $00. (We'll locate the PPI to address $08 later.) All of the 8 UART registers are given a name. For example UART_R3 is at the UART address $00, plus address $03, for a total address of $03. Sounds weird but it will make more sense with the PPI starting at address $08. PPI example: Port A is address $00 + PPI address of $08 = $08. Port B is address $01 + PPI address of $08 = $09.
In line 33 we point to RAM address $FFFF for our Stack Pointer. Every PUSH onto the SP will decrement its position typically by 2 so the next PUSHed value will be at location $FFFD. When it's POPed off, the SP will point to $FFFF.
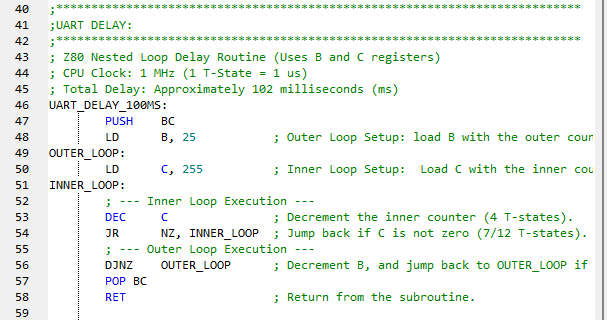
UART Delay Lines 40 to 59. Line 37 in the previous screenshot calls for a delay for the UART of about 100mS. We see this in line 46. This is necessary because the UART needs a moment to be made ready after the CPU boots before it can accept config data which is what we JumP to in line 38.
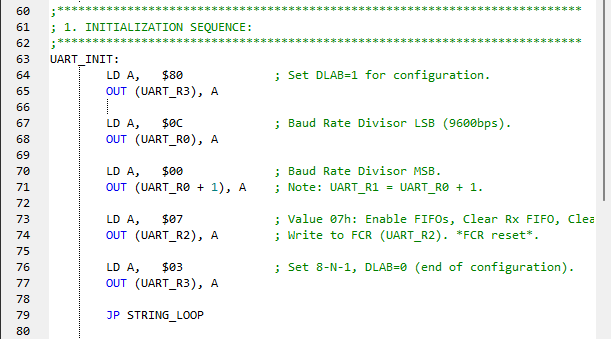
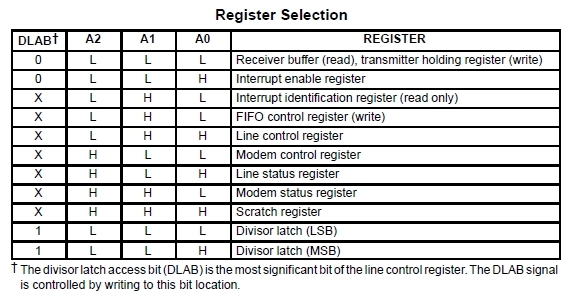
UART Initialization All of the affected registers are given specific values to make them ready to accept data. UART_R0 in DLAB mode (see 16550_UART_Register _Selection-1.jpg) is setup for 9600bps (see Divisor Latch Registers.bmp) and UART_R3 (see LCR.jpg) for 8 bits, no Parity, 1 stop bit. Once R3 is configured via the OUT command, the DLAB exits config mode and enters data mode for the Rx and Tx FIFOs as well as the THRe configured in line 73. Config is complete.
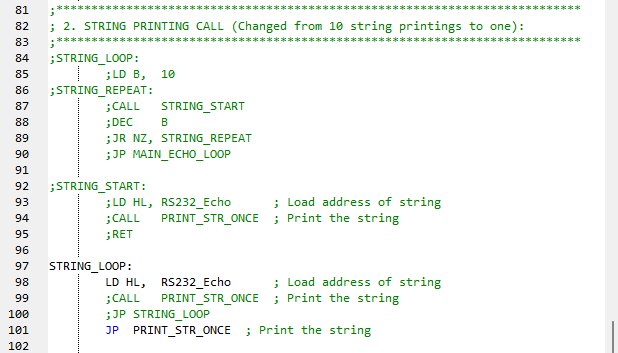
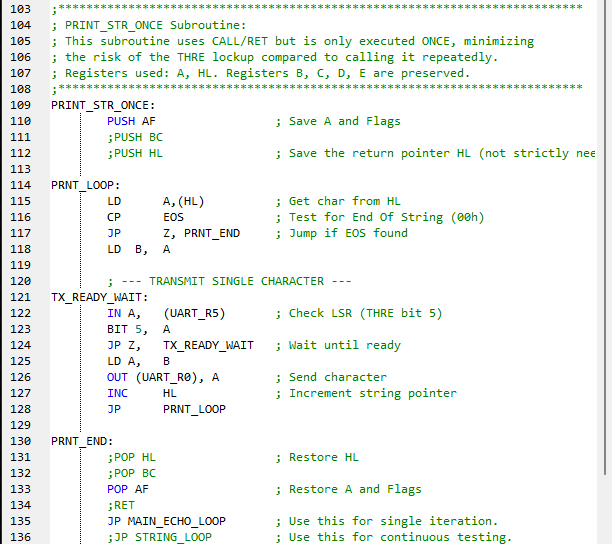
Jump to Print String This loop allows us to print the string of data in line 163 (in the last screenshot) ten times. However, it's flaky because it quite often does not stop after ten prints, so it's been mostly commented out. Line 101 does jump to the PRINT_STR_ONCE function.
Execute Print String Line 115 loads the location of the string pointed to by the label RS232_Echo, specifically the first character "R", in line 164. In line 116 it checks that it is not $00 and proceeds in line 118 by backing it up to register B. The TX_READY_WAIT routine checks if the UART is ready to send (byte to bits) then copies the "R" stored in register B to UART_R0, the Transmitter Holding REgister. Line 127 increments the HL register to the letter "S" of "RS232..."and the character loop repeats. If you examine line 164, you will see that the last Data Byte is $00. This is the End Of String or EOS marker. Once it is seen in line 116, the program jumps in line 117 to the end of the print loop. The register A and Flags field that were protected by PUSHing them onto the stack are now restored with a POP in line 133. The next command is in line 135 to jump to the echo program.
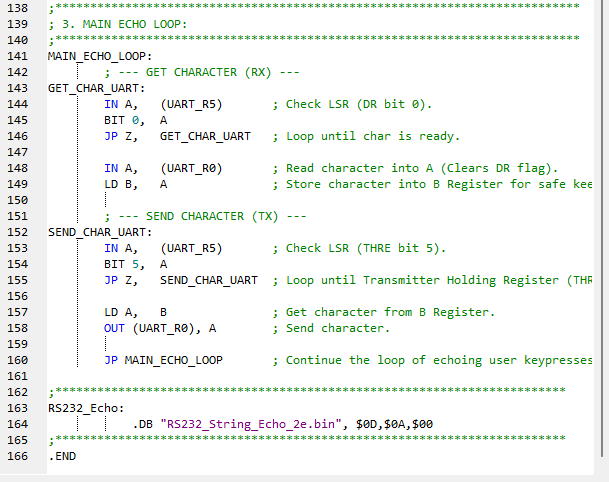
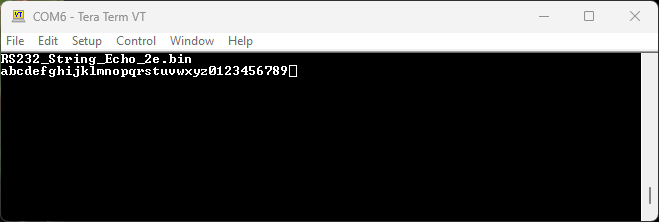
Echo Keypresses This program portion is the same as you saw earlier in Page 14: UART Echo Test: whatever the user types is echoed to their screen so they can see it. You can see this in the last adjacent screenshot. (Note that if you have the terminal function Local Echo enabled then you will see two for each keypress.) This is the end of the program.
|
UART Register Definitions
UART Delay
UART Initialization
Jump to Print String
Execute Print String
Echo Keypresses
Terminal View
|
![]()
![]()
Updated 2025-12-08