|
Project 45: |
|
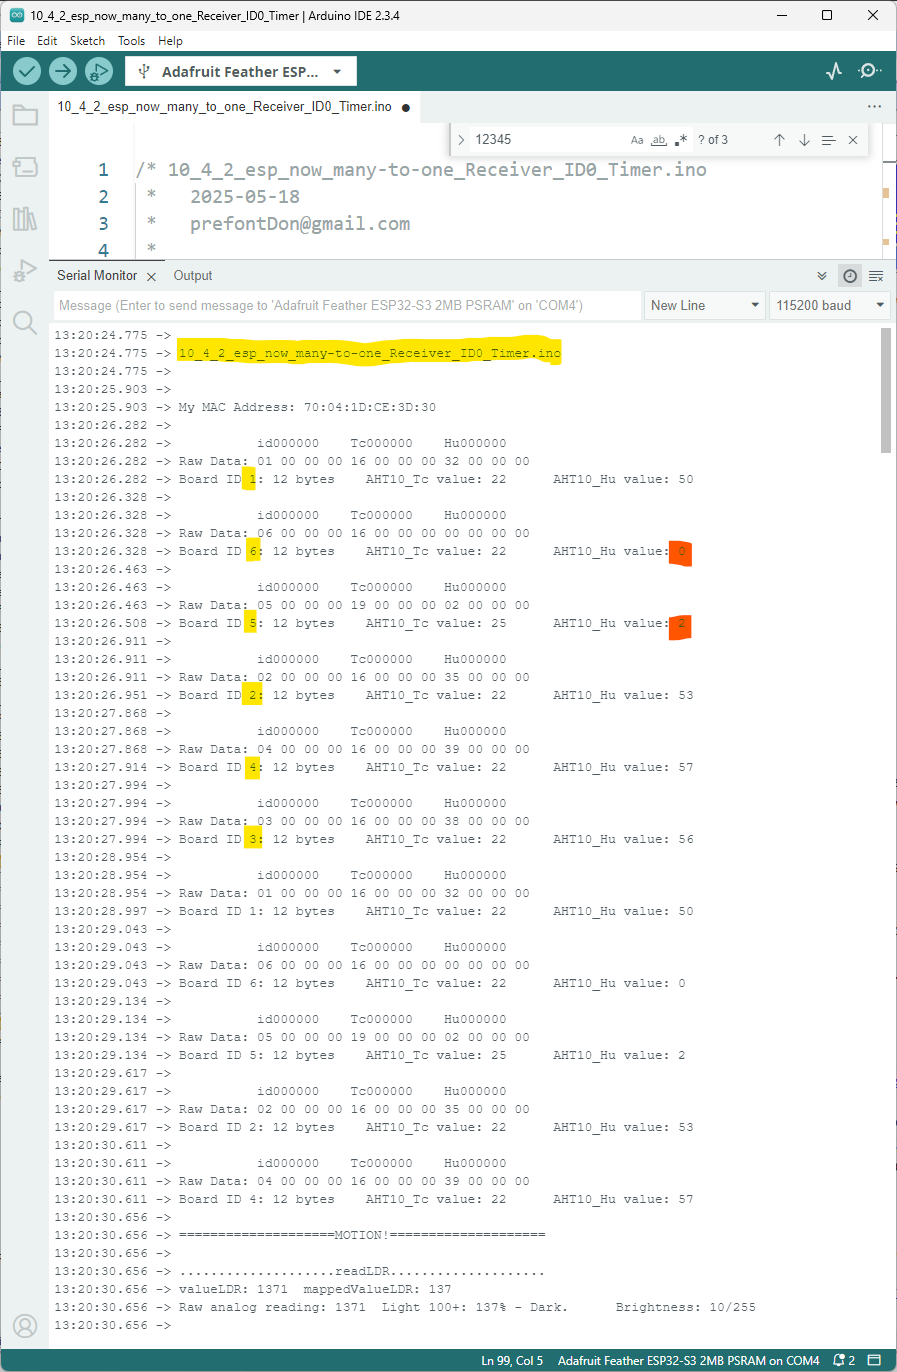
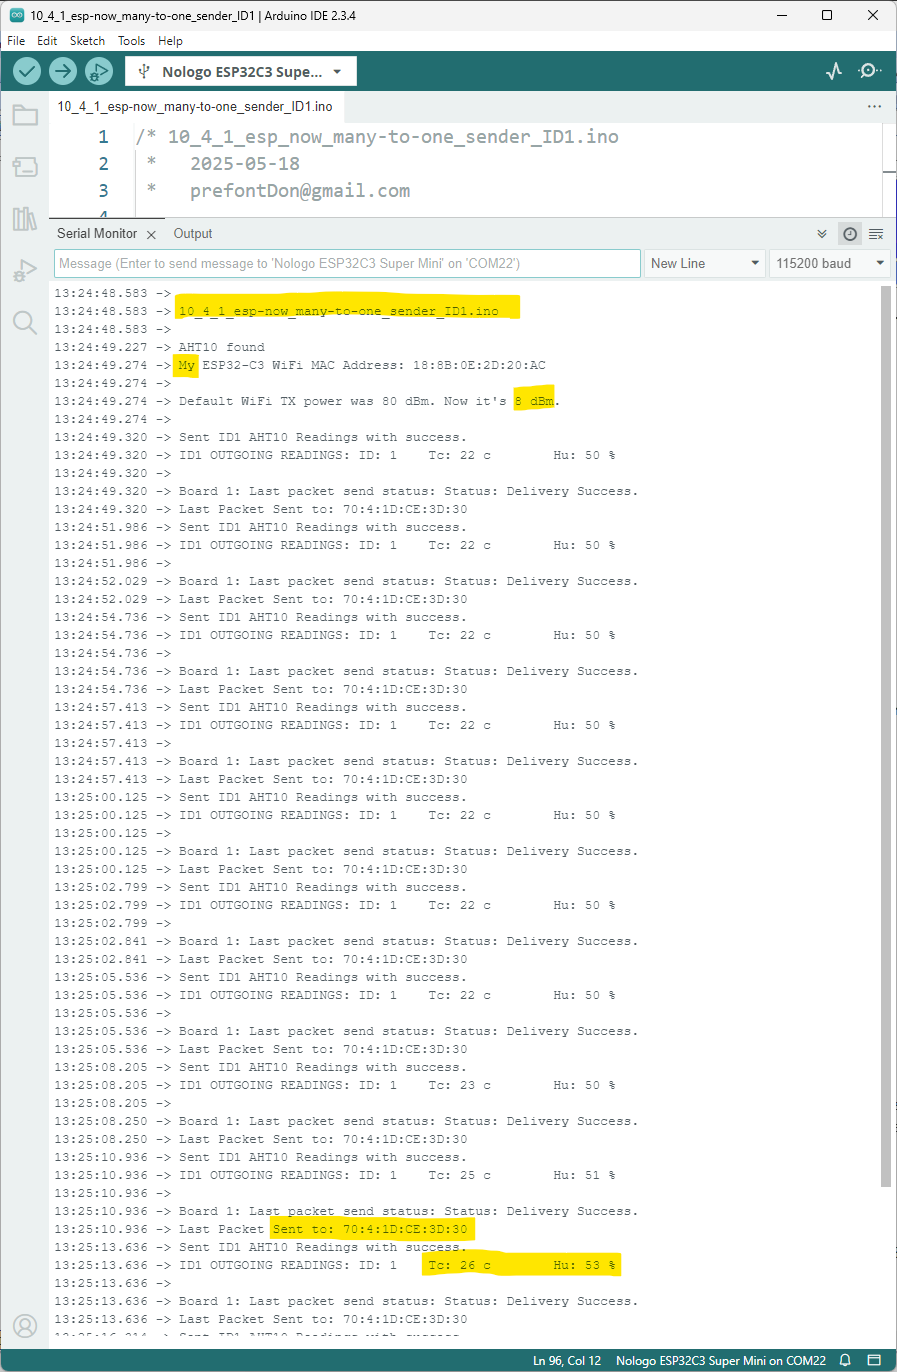
Arduino IDE v2.3.4: ESP-NOW "master" on left receives data from one of several ESP-NOW sensor nodes on the right (Click to enlarge)
Video of Master's 2.0" TFT Display of 8/10 Sensor Nodes (Click to enlarge)
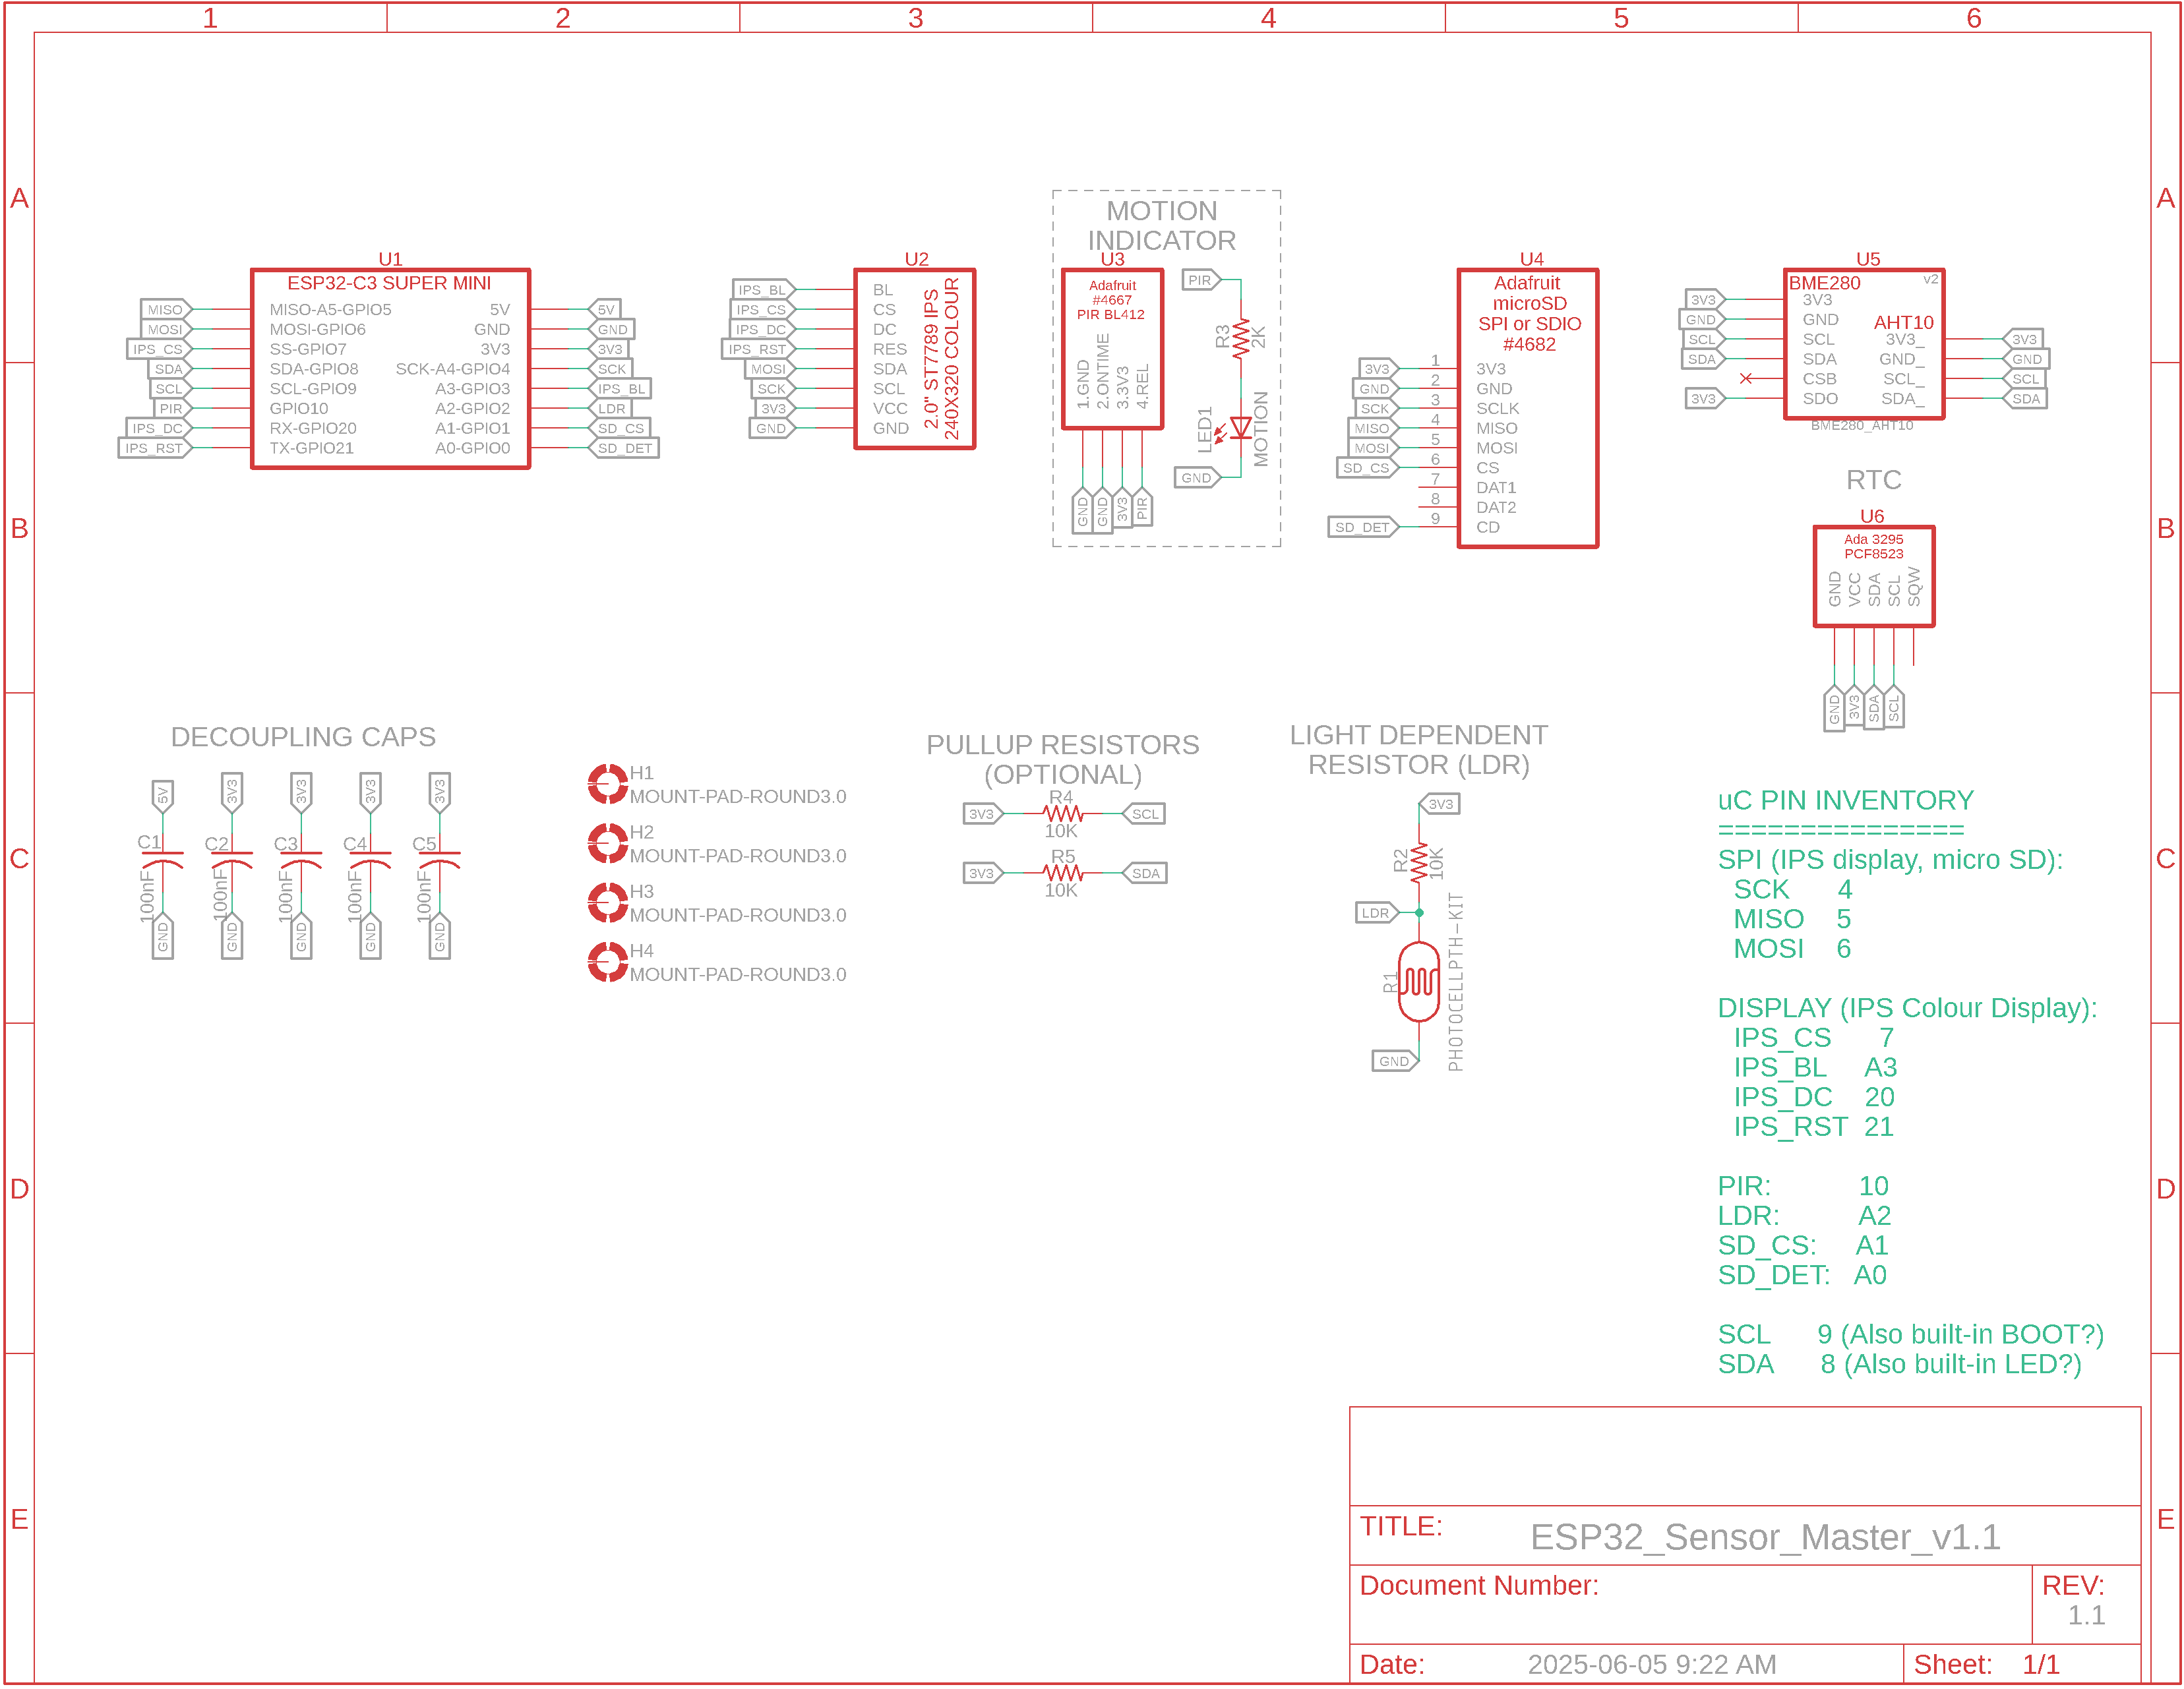
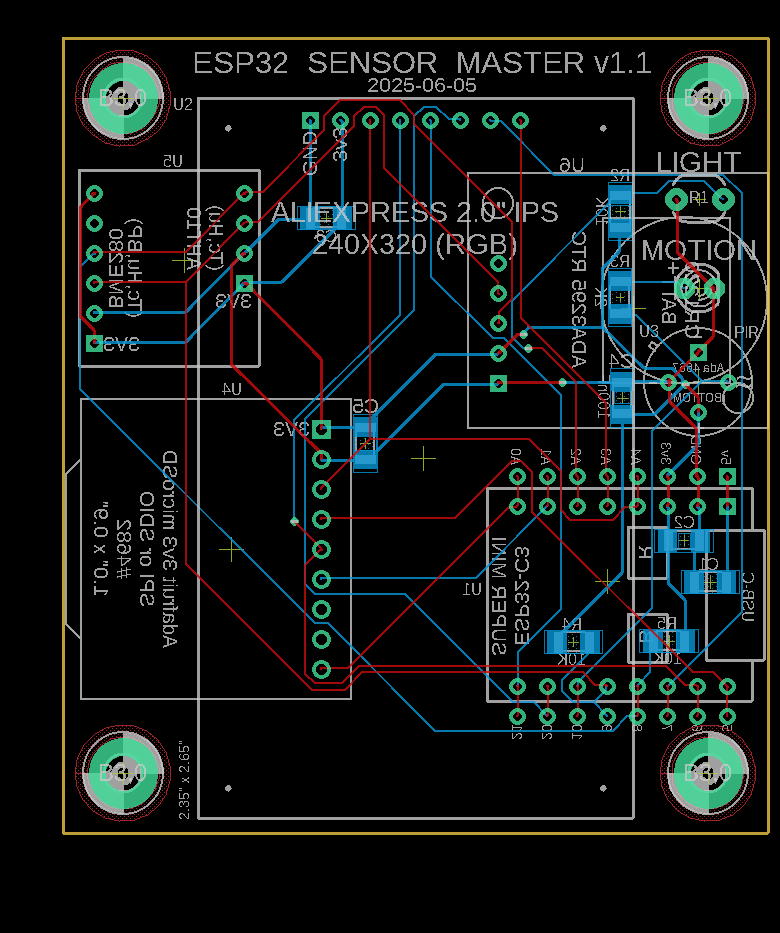
MASTER: v1.1 Schematic, Board Layout, Top & Bottom PCB
BOM: Master
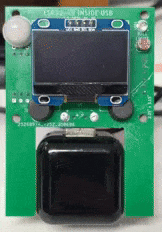
Video of Sensor Node Attached to a USB Block Charger. Shows ID #2, Temp of 21c and Humidity of 34%
SENSOR NODE: v4.1 Schematic, Board Layout, Top & Bottom PCB
SENSOR NODE: v5.2 Schematic, Board Layout, Top & Bottom PCB
BOM: Sensor Node
Overview: An ESP32-C3 Super Mini microcontroller uses ESP-NOW in "Master" mode to receive sensor data from 10 sensor node boards also running ESP32-C3. The sensor nodes send their stats to the master periodically for display on its 2.0" TFT display and for writing to a micro SD "drive". The master controller also has an LDR to set the TFT or LED brightness and a PIR to sense movement. An idle timer ensures the display is updated periodically if there is no motion.
Microcontroller & Docs: 1) ESP32-C3 Super Mini Dev Board: https://github.com/sidharthmohannair/Tutorial-ESP32-C3-Super-Mini/ 2) Random Nerd Tutorial on the Super Mini
Arduino Code: My modified code is from Random Nerd Tutorials course, Learn_ESP32_with_Arduino_IDE_V3_2. Master receiver sketch and sensor node sketches EN_v3.zip.
Note: when you compile the code to upload to your Nologo ESP32-C3 Super Mini, you must select ESP32 by Espressif Systems v3.2.1. Running anything newer may break other ESP32 sketches. Running anything less, example v2.x, will cause continual errors with this sketch.
ESP32 Forget: If your ESP32's cache of WiFi MAC addresses seems corrupt, run this file to hopefully clean it up: ESP32-C3_Super_Mini_Forget_Cache.ino If your ESP32 misbehaves, remember to press and hold RESET, press and hold BOOT, release RESET and then release BOOT, in that specific order. Then upload your sketch.
ESP-NOW Reference: https://demo-dijiudu.readthedocs.io/en/latest/api-reference/wifi/esp_now.html
Note: If the ESP32-C3 sensor nodes are too close together when testing in the lab, the receiver won't appear to work. That's most likely due to the transmitter's signal being too strong given the receivers' proximity. Either move them far apart (not likely during testing!) or add the code snippet below to all of the transmitters in the lab area. This setup() code will alter and show the TX strength.
WiFi.setTxPower(WIFI_POWER_2dBm);
// 2 = 8dBm, 5 = 20dBm. 0 to 20.5 in 0.5 increments. 2,5,7,19 work
with ESP32-C3.
BANGGOOD LINK FOR SH1106 OLED DISPLAY.
|


![]()
Updated 2026-03-11